Monday, November 17, 2008
Flying and testing
Monday, June 16, 2008
First Flight
 G-IKON flew for the first time today under a 4000' cloudbase and with a light and variable wind. I went along for the ride.
Takeoff was reminiscent of a winch launch in a glider. The transition from ticking over at the end of my strip, to climbing at a very high rate, being seriously abrupt. With me and about half tanks, gross was 1260lbs. With 160hp and an MT c/s prop on the front takeoff was not a problem. Prior to take off I had done one short acceleration to ensure that I could cope with the torque steer (my strip is narrow marginally more than the span), and that full power was going to come in smoothly. It was so clear that she was extremely easy to track straight, and that getting off the ground was not going to be a problem, I backtracked and repeated the process for real.

She was off in about 60 yds. Being unfamiliar with the trim (or anything else) I had a slight fight to keep the nose down and aim for speed for cooling, rather than climb rate. It is a new engine.
I climbed to 4000' overhead, before letting go of RAF Leeming with 10000' of concrete located just 5NM from my own strip, and headed for Bagby, my local airfield. Once in range of there, I slowed down and did a few gentle stalls and a very brief slow flight practice. IKON clearly has a heavy left wing which needs to be sorted, and that limited how slow I wanted to go. Stalls with small amounts of flap gave the impression of being sporty, but at full flap everything appeared very predictable. I made a clear decision to settle on finals at 70mph until the heavy left wing and stalls, have been investigated further.
Landing, the thing we probably all worry about the most on first flight, was a complete non event. Considerably better than most landings in my Supercub, and I have done over 1100 of those.
So with perhaps 20 minutes in the air, it was time to take a look and see if all was as it should be. It then became clear that the oil had decided to try to migrate to the bottom of the fuse'. It turned out after a lot of swearing, and at one stage believing the cooler was ruptured, that it was all emanating from the cooler/hose junction. It was a bit less than tight! In all perhaps half a pint of oil had leaked, but it makes a great mess!
With full tanks and a little more confidence back in the air for the short flight, 30 minutes including an extra circuit and slow flight, to Fishburn, my other local airfield where she is to remain until I have learned to land short, and can return to my own strip. Time was pressing for my ground crew, who had promised to drive me home, so only two landings before she was pushed into the hangar until tomorrow, when I will take the cowl off and have another good look around. Possibly a very little more oil had leaked, but my guess is that is just some of the mess from before, finding its way out.
A 70mph approache to be safe, faster than I expect to use in the future, resulted in very short easy landing each time. As I said before, quite as easy as my Supercub. Extraordinary!
Looking at the data coming off the AFS one cylinder went briefly to about 410F, the rest of the time they sat at about 360 at the back and 325 at the front. This is probably reasonable, since the lowest power I used was about 25 square. The EGT were giving temp warnings, but in retrospect I think the warnings are probably set lower than they should be. The highest they got to, with the whole flight at full rich, was 1500F at the back. Possibly the sensors are sitting just a little close to the engine end of the pipe.
I need to review the data again, but I don't think the oil got above 170F though that was right at the end of the flight, so perhaps with a longer run it might get to the magic 190.
G-IKON is the first Lycoming style engine in the UK (in this case an O-320 from Superior) with dual P-mag electronic ignition from E-mag. Getting approval for this from the LAA has been quite an interesting journey, though I have now arrived. I will have a longer test period than normal as a result, in terms of hours, chained to the two airfields mentioned above.
And now for the thank yous. First of all to my wife for being so supportive with coffee tea and cake, though I can honestly say the entire plane was built without her ever touching a rivet gun, bucking bar, screw driver or wrench. (She has just pointed out that she did make two aileron pushrod cuffs to keep the draft out! Oops!!)
To Andy Ratcliffe and Fred Parker for supporting me throughout the build whenever I needed > 2 hands, and today, departing from my strip. To Mark Golding who has signed his name about 60 times to my work, for the LAA.

To Andy again, and Peter Pengilly, who supported me in making a case to the LAA for electronic ignition, and finally to Francis Donaldson at the LAA who at all times took a jaundiced view of the idea, which only serves to look after my safety. It appears to be working well, but of course it is early days. US experience is well reported. I will report mine in due course.
There is a short clip of the first lift off here.
And just to remember where in time this occurred two political quotes which cheered the UK in the summer of 2008.
"The one good thing about global warming is that as the waters rise, Hazel Blears will drown first."
That thought just makes me want to burn more fuel and speed the process!
"Our Leader [Gordon Brown] is utterly useless. If you asked him which of the two doors from this room he was going to exit from he would be incapable of choosing. And if someone else chose the door for him he wouldn't be able to make his way there. "
Both are attributed not to the opposition party, but to their colleagues. It is reassuring to see that the true awfulness of our government is understood by Labour party membership.
Tuesday, May 20, 2008
Time to go flying!
 ....well not quite though I am nearly there.
It needs to be weighed and the upper gear fairings installed.
We did a snagging list the other day and it was trivial except for one item. I may yet have to take the engine out to change the fitting where the oil pressure comes out of the engine. It appears it was damaged and does not make a good seal.
Hopefully, it will be weighed by this time tomorrow.
 It was scary specifying the colour scheme though I am extremely pleased the way it has worked out. It certainly gathers and shows dust though.
John Stahr did the painting and had massive input into the design detail. He is Oregon based and I highly recommend his work.
(Double click the pictures if you want to see detail.)


Wing and electric detail added plus fuel flow.
At electrics I have shown details of the wiring behind the panel. It looks very untidy I am sorry to say. I just find it hard to make it look tidy.
In the UK, the LAA (was PFA) ask us to run a fuel flow test. This is to check that the flow of fuel from the electric pump considerably exceeds the maximum demand of the engine. I am not sure where they would consider the flow was inadequate. I think the major thing you are checking for is blocked fuel pipes, perhaps kinked in construction. The O-320 has a max demand of about 53 lph and the Facit pump was pumping about 105lph from either tank, to the fitting at the entrance to the carb.. That was good enough for me.
Friday, May 09, 2008
Canopy installed today.
 The canopy went on for the final time today, and for the first time since painting. I forgot to run the pin through a bit of Scotchbrite, so it was a battle.
The canopy needs a good clean but then so does the whole aircraft right now. Its dusty in my hangar.
I am currently finishing up the ignition harness and I need to get the tank back on. I am also draining the preserving oil in anticipation of the first engine start.
(Double click for bigger pictures.)

Sunday, April 13, 2008
The panel is complete.
 Here are a couple of pictures of the panel. Double click them to enlarge.
In fact it is not quite complete. The canopy warning light is missing, and there are some nuts to buy and install, and wiring and pneumatics to complete around the back. One label for the two switches on the left below the panel is missing. The LH one, OFF - Master ON - Alternator ON. The RH one, OFF-Strobe ON - Start.
I am pleased it has worked out well. None of the off-panel switches need to be touched in flight, leaving just flaps and fuel pump in front of the throttle quadrant, and trim, PTT and A/P disconnect on the stick. That should let me concentrate on flying. The instrument below the ASI is a TruTrak AP.
Thought for the day.
"A lot of times in politics you have people look you in the eye and tell you what's not on their mind." George Bush, April 6, 2008
Saturday, April 05, 2008
Firewall forward is nearly complete.
 The wife has been away a few days so progress has been dramatic even if I am loosing weight!
My oil cooler /cabin heat system was completed today, and the carb heat system a few days ago.
You can see details of both if you go here, together with mounting details of the pressure sensors and the short RV4 oil dipstick.
At this stage it is nearly complete at the front. I need to hook up the ignition leads, terminate a couple of wires where I ran out of parts, and I guess it would be a good idea to bolt the prop on soon. Oh. and before anyone worries. there are quite a few nuts/bolts/washers to sort out yet!
Wednesday, March 19, 2008
Jacking
 I am getting down to a shorter list of tasks before the wings are installed for the last time. I am beginning to get to the items on the list I either don't know how to do, or don't want to do.
Saturday, March 15, 2008
The Panel is nearly complete
 The panel is nearly complete. All the holes are cut, it now needs holes for the flap switch and fuel pump and some warning LEDs. I am pleased that I have managed to reduce it to just two switches necessary in flight, rather than the ergonomic nightmares that so many prefer.
  The GPS gets quite a strong signal inside my workshop. It has a tin roof. I wonder how that works?
Saturday, February 23, 2008
Wiring.

Sunday, February 17, 2008
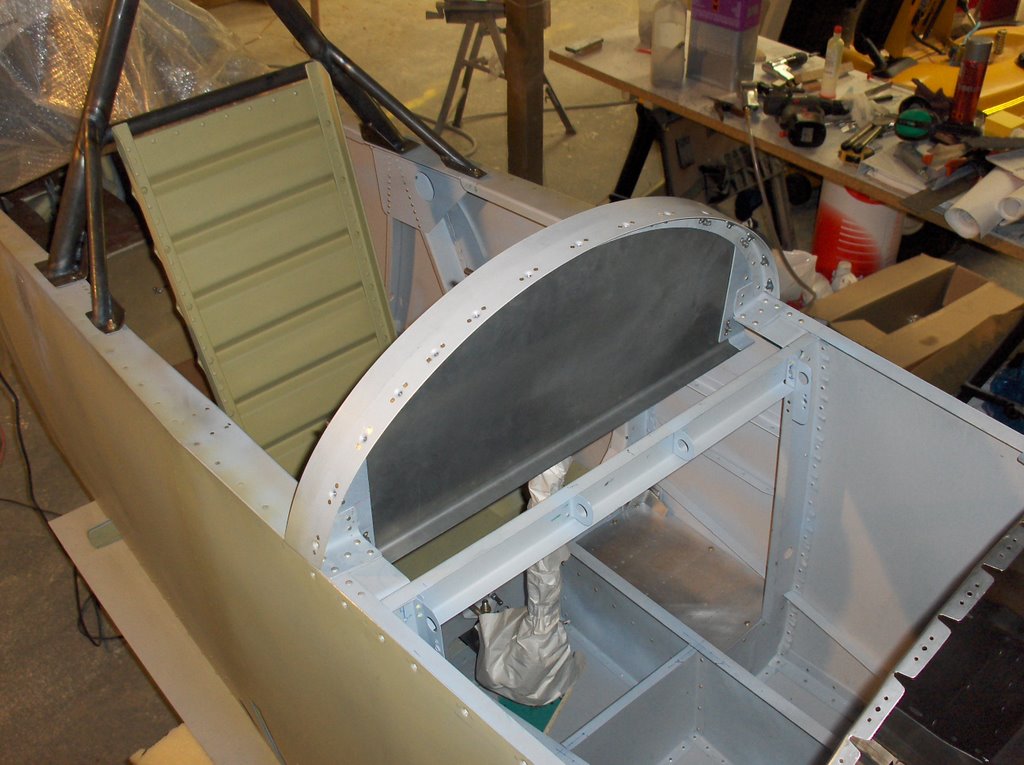
Carb heat, breather and oil cooler.
 If you want to see more detail double click on any of my pictures for an enlarged view.)
The 'extras' around the engine continue to find a home. Building the -4 is significantly different to the -9a, in that with the -9a VANS provided a plan and told you where to put things. With the -4 you have to decide. Complicating the exercise considerably, is the much smaller space inside the cowls than is available with VANS side by side aircraft.
In this picture I have found a home for the carb heat muff, installed the engine breather, and finally secured the oil cooler.
You can see more pictures in the 'firewall forward ' section or here: http://gikonfwf.blogspot.com/2008/02/carb-heat-muff-and-other-layout-views.html#links
Thursday, January 24, 2008
The back end is complete!

Saturday, January 19, 2008
AFS3400

Sunday, November 11, 2007
Engine cowls
 I put the engine cowls on today for the first time since painting.
Well, at least they will know its me!
If you are wondering what colour it is, I will never truly know until it is out in the sunshine. It is a Honda colour; Cosmic Grey. The clue is the colour you see next to the yellow on the cowl cheek.
A little silicon grease on the hinge pins works wonders!

Tuesday, October 09, 2007
Painting was finished last Sunday.

Wednesday, October 03, 2007
Painting started yesterday

Thursday, September 06, 2007
A final check to be sure all the pins go in and out OK
 This is probably the final time I will assemble the front end fiberglass parts before she gets painted. Since they are not lubricated I was pleased with how well the cowl pins went in. The chisel point that VANS recommend, on the pins, is an important tip.
The curvaceous look has grown on me as the cowl has come together.
The cowl cheek extensions are held on with Sikaflex and rivets.
On the far side you can just see a black box the fuses slide into. Remember to put the nutplates on the outside, before you install the cheek extensions, if you want to do things this way.
Saturday, August 18, 2007
Setting up the landing gear fairings.
 I am pulling out the stops to get everything ready for painting in a few weeks time. This means confronting the fiberglass which I hate. The cowl is nearly complete, and in the next day or so I will start to try to seal it and get rid of pin holes.
Wednesday, July 25, 2007
Engine cowling continued.

Monday, July 23, 2007
Engine cowling

I have started on the engine cowling. Suddenly you can really see her shape.
Because of the shape change due to the cowl cheek the -4 cowl is a much more robust structure than the -9a cowl with I worked with last time.
For more details of the engine cowl work go to 'Finish Kit'.
Friday, July 13, 2007
Hanging the Engine
 We hung the engine today. You can see a little more information and pictures in the 'Firewall Forward' section of the blog.
 Monday, July 09, 2007
3 greens!
 Finally she is on three wheels! It feels like a major step forward, and that I have passed the half way point.
I have minor details to do to the fuselage; rudder cable exits/fairing, rudder stops, elevator stops and then its on to the engine and systems. I much prefer that.
The last few weeks have been spent fitting the canopy. I fixed it with Sikaflex rather than rivets. If you are interested go too the 'Finish Kit' section of the blog.
 I sat in it for the first time a few days ago with the canopy on. The seating position is reminiscent of my Supercub.


Wednesday, May 30, 2007
The Interior is painted
 I have painted the interior with 2 pack over the last few days. I found it surprisingly easy, and only made one small run. With the painting behind me it seemed like time to start putting some bits together while I can still find them.
The coil of tube you see in this picture is just the end of the static tube which has not yet been cut to length.
Oh and yes, it is made to have a removable panel like a Rocket.
(Click the picture to see better.)
 My wife is a happy passenger, but does not want to do the flying, so the stick fits here held by a pip pin and a spare UHM block when not required.
 The one mistake I made in the painting is I only intended to put top coat on the visible surfaces. I painted the wrong side of the lower panel at the rear of the baggage compartment so you are looking at primer, not topcoat.
I hope I have the ergonomics correct for the quadrant and fuel valve.
The front compartment hinges open. I intend to use it for additional storage and to adjust CofG.
Sunday, April 22, 2007
Fitting the Canopy Frame

I de-installed the wings yesterday. They wont be refitted until after painting. The next major step is the canopy. Getting the frame to fit the canopy looks like quite a bit of work. After half a day with it I am quite baffled. You can see more pictures on the Finish Kit section of the blog.
Monday, April 02, 2007
Christmas comes again!
 My c/s prop arrived today from MT. It was hard to resist ripping all of the wrapping off, and giving it a good stroke. But I think it is better off left in its box though, so that is where it will stay until needed.
 I have achieved a lot recently. The fuel bay is largely complete and its cover installed. For a better view under the cover click here .
I have now started on the rear seat .
Thursday, March 01, 2007
Setting up the wings.

Monday, February 05, 2007
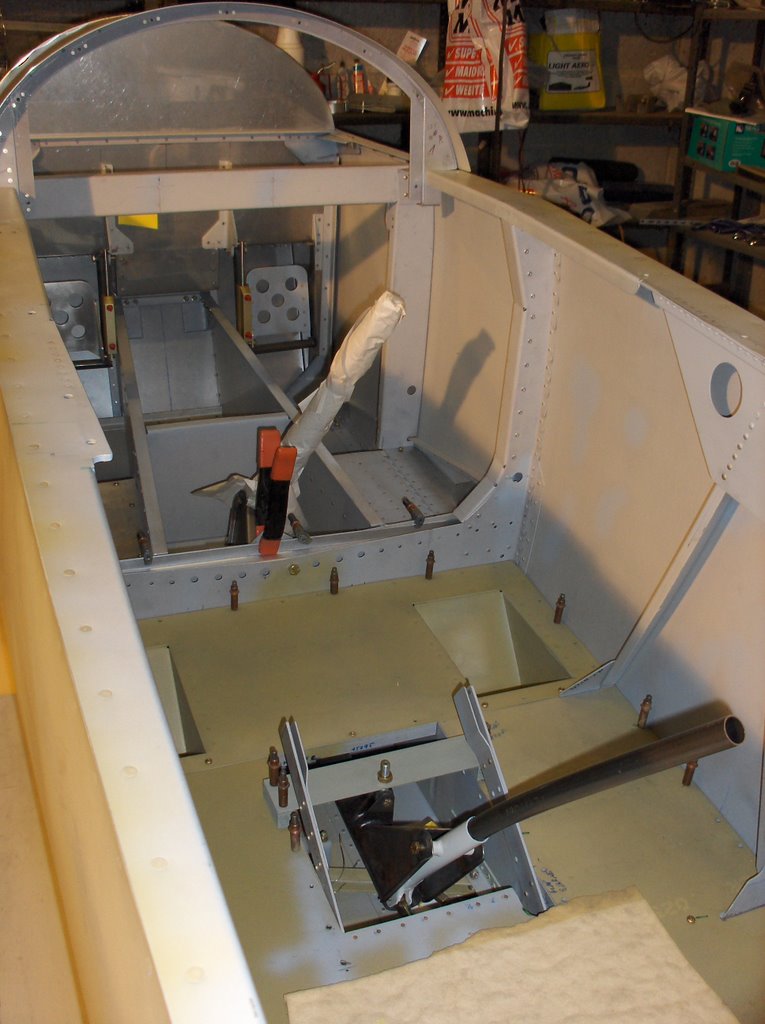
Centre Section - Control System
 Since the wings went on I have been setting up the control system in the centre of the fuselage. You can see more details in the Fuselage section of the blog.
Friday, January 26, 2007
Comment Only
Thursday, January 11, 2007
Today the wings went on
 Today the wings went on. At 11am the wings were in the cradle and my friend, also an ex glider pilot, arrived. By 12:15 both wings were on, 12 bolts installed, and we were wondering what all the fuss was about. (I mention ex glider/soaring pilot because we both have experience of putting wings on each time before we fly! I think this experience simplifies the task.)
There are a few more pictures here .
Labels: wings fuselage
Wednesday, January 03, 2007
O-320 from Aerosport Power

Sue and Brad at Aerosport Power have been as nice as anyone to deal with.
Sunday, December 31, 2006
Happy New Year
At vast expense, and with no help from Orange plc, I am finally back on broadband and the link appears reliable, so my enthusiasm for the blog should return.
Quite a few of you appear to follow this, so Happy New Year to you!
Sunday, December 03, 2006
Gear down - two greens!
 A big step forward today! The fuselage is finally sitting on the main gear. Very satisfying. It also makes it much easier to move around so I can maximise the light on the task, and the heat on me, while I work. Its getting miserable in the UK at this time of year.
Recent progress has been inside the fuselage, and of course getting the engine frame on. All the steelwork has been powder coated.
Thursday, November 09, 2006
Stupid incompetent phone companies.
Working with these companies is how I imagine telephony is supplied in the third world. I suspect as an employee if you have an IQ exceeding 50 you are not eligible for employment.
Thanks for your interest. Hope to be back sometime.
Monday, October 09, 2006
Finish Kit and Firewall Forward items arrive.
 Christmas has arrived in October this year. My Finish Kit and 'home brew' FWF kit arrived last Saturday morning.
There was some damage to the canopy skins, but VANS have taken a supportive attitude and will ship replacement together with a friend's shipment, later in the year.
I want the fuselage up on its gear legs asap, so my work is now in putting the landing gear together.
You can see what I am doing if you go here.
Monday, October 02, 2006
Front Seat
The front seat went in today. The other item of progress is that BAX Global moved the Finish Kit from Portland to Los Angeles. It seems somewhat further from the UK than when it started, but perhaps it will head here from there.
More pictures of the seat on the Fuselage page.
Saturday, September 23, 2006
Firewall Forward decisions.
If only Orange could provide a reliable broadband service this would all be much easier.
Monday, September 04, 2006
Progress while my broadband service has been kaput.
Finally I have broadband service once again. I have to say it has become a basic necessity and I have the same feeling as one does at the end of a power cut lasting several days. (Yes, the electricity supply industry is fairly 'third world' in the UK also.)
So lots of progress since the last update. The fuselage interior is coming together nicely, see the FUSELAGE catagory. I have also started to install the wing tips, so an entry under the WINGS catagory.
For a couple of reasons I have moved away from the empenage for now but will return to that in a bit.
My Finish Kit and lots of other parts should be leaving the USA this month, so soon I will have to think about ordering an engine.
Tuesday, August 01, 2006
Attaching the HS.
http://gikonemp.blogspot.com/2006/08/attaching-horizontal-stab-hs.html#links
Now it is starting to look like my posting of 1st July below.
Saturday, July 01, 2006
Wow! I'm building a plane.

 It's been hot today. I am not actually fitting the HS yet, but to give myself an enthusiasm boost I laid it across the aft deck. Wow! I really am building a plane. I think it looks great.
If you go to the fuselage page you will see where I really have got to. http://gikonfuse.blogspot.com/
(The background shows you why I have never posted a picture of my workshop on Doug Reeves site!)
![]()